
Electric Guitar building Kits
 While electric guitar kits offer a relatively inexpensive method to enter into electric guitar building it may ver quickly become costly and time-consuming if you run into problems. Let’s face it if you are going toward difficulty to build a guitar chances are you desire a musical instrument you will be proud to phone your personal. We detailed some typically common blunders below in the hope of helping other individuals stay away from a number of the more prevalent issues.
Is everything lacking?
The very first thing you should always do is simply take stock of the various components and electric elements. It’s a real hassle if you learn you're missing an important factor method through a build. As a result we always recommend a dry fit very first to ensure that you tend to be covered.
Glue in Necks
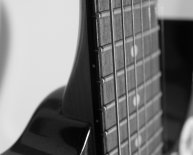
There are certain items that can go wrong when establishing your throat. Many guitar kits are bolt on and this will help you stay from difficulty generally. But if your guitar is set throat want to get your scale length proper while making certain you are making use of a good glue. Scale size is important, right here’s a web link to outstanding article from Stewmac.com that addresses this in detail.
As far as a proper glue setting your guitar system neck stick to Titebond or something of the same nature and make sure you utilize timber obstructs whenever clamping in order to avoid harming the throat. Depending on the glue you utilize you need to allow neck remain for about 12-24 hours and remember to simply use as much glue since you need. If you are using an excessive amount of glue there is a solid possibility you'll have residual glue among the throat and hole that may influence upon your sustain, you ought to be aiming for throat against body timber.
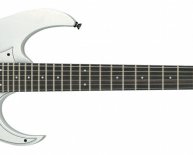
Cutting your Headstock
Many electric guitar kits incorporate a paddle-shaped headstock, makes it possible for you to definitely personalize to a shape you want. When considering your headstock form begin with the finish at heart. e.g. have a template ready to go and transfer the design you wish onto the headstock before cutting the timber. Use something non-permanent e.g. carpenters pencil.
Ensure whenever you do start cutting that you remain really and undoubtedly on the exterior of the tagging as it is always better to adjust inwards than restoration a cut made too near to the advantage. When satisfied with your shape begin sanding back using a rough measure sandpaper or file and work the right path down to a light measure sand paper. Have patience and consider your contours not only the side of the headstock and you'll get an excellent result.
If you don’t possess resources e.g. a great jigsaw or dealing saw, your’e most useful wager will be keep things easy, don’t opt for something too sophisticated and stick to perspectives that can be slashed with a straight saw cut.
Grain Filling
 Depending regarding the style of wood your electric guitar kit body is made up of you may need to use a wood grain filler to fill the pores of timber that may after that allow a more also surface for the next phase of finishing. Loose grained timbers eg Ash or Mahogany will generally need some therapy. Securely grained timbers such Maple generally won’t need a grain filler anyway. Whenever using work the whole grain filler to the wood initially using the services of the whole grain after which against it before you are pleased you have a good consistent surface to commence painting. You'll find out more on wood grain filler right here.
Undercoating
Whenever you are going for a great shade complete an undercoat will undoubtedly be required. People make the error of not properly planning the guitar before undercoating. This an error because any imperfections remaining regarding wood could be more obvious after each layer you increase the area regarding the guitar.
I’d recommend whenever undercoating you limit yourself to 2 coats maximum and keep carefully the protection reasonably light. The only real basis for undercoating would be to provide a good surface for finishing.
Finishing
Remember when painting the guitar along with should really be accumulated slowly while you add more coats. There’s a couple of known reasons for achieving this:
- You may stay away from paint works from applying the paint also thickly.
- Next applying light coats lets you slowly develop the color. The purpose of your finish is protect the guitar while permitting the normal tone for the guitar to shine.
Drying Out Time
Typically your brand-new guitar will stay tacky for some time. Typically your guitar can be touch dried out within approx. 7 days but will just take 1-2 months to dry up sufficiently for you yourself to finish the installation regarding the guitar. A word of care, don’t start the last buffing or applying metal wool until the paint has hardened off. Or else you are going to be left with markings and often little parts of metal wool embeeded inside newly done paint job which can be obviously the very last thing anyone wants.
Wiring
Another huge section of trouble is getting the electronic devices wired precisely. Some kits (ours included) prevent this matter because they are pre-configured with simple breeze in place connections. Some designs e.g. many Strat and Telecaster guitar kits will come with most of the wiring currently looked after causing you to be only a tiny mount of strive to complete the job. Nonetheless numerous electric guitar kits need you to be relatively able with a soldering iron because you will must handle the job from beginning to end.
If you should be generally not very skilled with a soldering metal or after schematic diagrams make sure you choose an electrical electric guitar kit this is certainlyn’t demanding or have actually some one you can consult with if required. Should you choose end up with a tricky wiring job there are many resources on the web to help since many of this typical styles of electric guitar have actually an extremely standard wiring setup to just duplicate.
Share this article
Related Posts

Latest Posts


