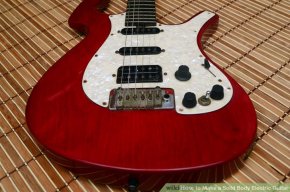
How to make an Electric Guitar body?
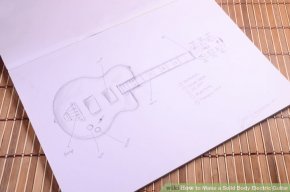
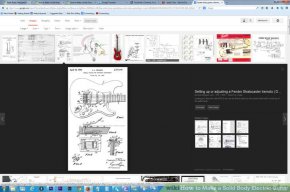 Create (or get a hold of on the internet) a technical design and make a parts record.
Print/draw a complete scale model of the drawing. Unless you have a large printer usage numerous bits of paper taped together (poster mode on some printers). To get it perfectly to scale will require some work. Very first printing and soon you get a total measurement that you can determine (may take a few pages). Gauge the period of the section. Today maximize the level for the image in pixels, by the labeled amount of the section and divide that by the real measured period of the section. This will supply your brand-new level. Use paint to re-size for this brand new height and then make yes you choose keep aspect ratio. Repeat this action twice for maximum accuracy.
Get the lumber. Frequently a butt joint is powerful adequate however if you prefer high-quality usage a biscuit or dowel joint. Keep in mind if you are using two pieces dense to not put two bones together. Stagger the joints. From a finish view wrong looks like ├────┼────┤ four pieces satisfy at one point. Right would seem like ├────┬─┴────┤
 Layout your scaled attracting onto an item of ply-wood NOT your guitar human body timber. Tape the paper down and make use of a pushpin to make a small indentation after the line every inch or more for big radius' and straights and 1 every 1⁄8 inches (0.3 cm) or so for detailed places. Play connect the dots with a pencil after eliminating the report to get the shape of yourself while the body cavity
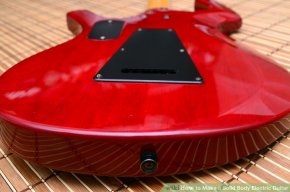
Utilize an exercise hit and file to accomplish your body cavity and pickup holes (NOT the neck pocket though) and make use of a jig/scroll saw or a band-saw to cut the exterior. Finish it up with a drum sander. (recall the faster you move your timber on a drum sander the greater the end result. Always use quick repetitive movements.)
 Once you will be pleased with the plywood design, make use of double-sided tape (flooring tape from any house shop works great) to attach the design towards human body wood blank.
Use a dining table router with a design little bit or a laminate trimming bit to approach the surface. (If you are using a hardwood you MUST make use of a band saw to cut near to the outside your design or perhaps the bit will grip the lumber and destroy your guitar and possibly injuring you. Make sure the bearing is holding the pattern and get the appropriate direction for the router/bit. GO CAREFULLY. Don't be concerned about burning up the lumber your planning to need certainly to sand it anyhow.
Utilize a hand router with a structure cutting little bit to approach out of the pickup and body cavities. Never perform some neck however, we are going to reach that later. Before routing the cavities use a drill hit to get rid of adequate lumber to make routing easier. (recall the less routing on a guitar the less chance to screw-up)
Trace the heel of the neck onto another bit of plywood and use a jigsaw/band saw and a miter measure along with a rounded file to make the throat pocket pattern. Test that in the neck to be sure it meets perfectly. When it can very carefully align the neck template along with the rest of the human body (THIS IS REALLY IMPORTANT it should be lined up accurately!). Utilize double sided tape to stay the template to your human body after that route just like the pickup and body cavities.
10
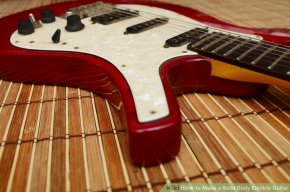
Use a Surform planer to carve to contour of the as well as arm if desired (some individuals state that a spokeshave in addition works well but I didn't have much fortune along with it).
11
Sand the entire body with 100-150 grit sandpaper (orbital or palm sanders work fine) accompanied by 200 and 250-300 grit report and one last damp sanding of 350 grit by hand.


Share this article
Related Posts


Latest Posts


